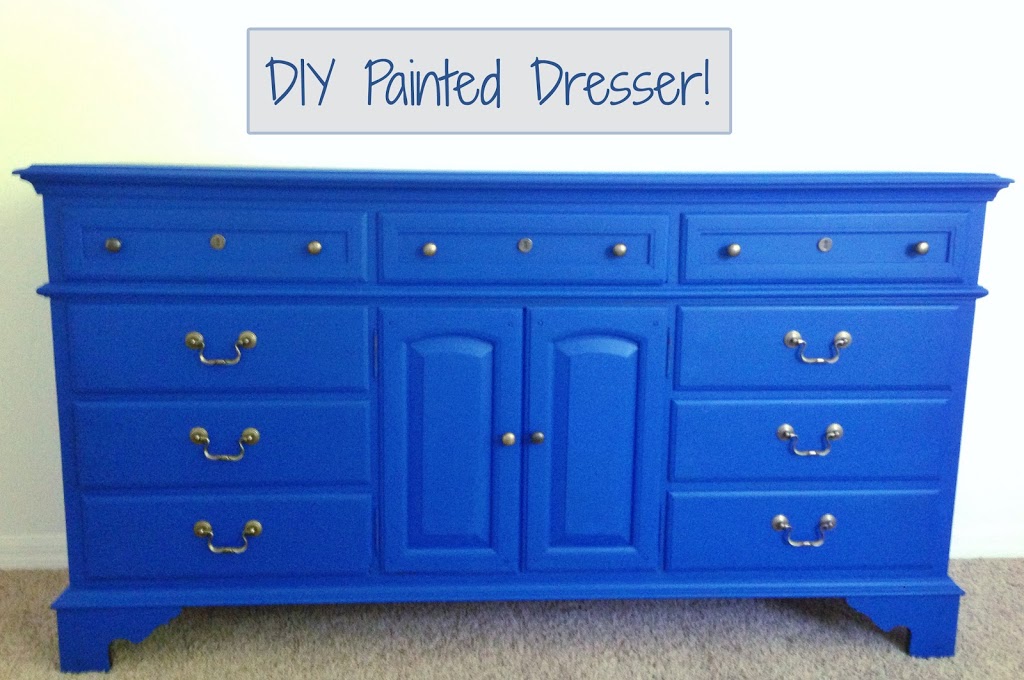
DIY PAINTED DRESSER
Hey guys, I wanted to share how I transformed this dresser on the cheap with no sanding/primer necessary!! We were going to sell or donate this because it was pretty beat up after moving from apartment to apartment. Now that we are in a house we wanted something new & different. I met a woman who “chalk-painted” a ton of furniture in her house & it looked so good I had to try!
Sorry the picture isn’t that great.. the charger for my nice camera decided to stop working, so I had to resort to my phone. We decided to try something crazy & make a statement with a cobalt blue. It took me a few days to muster up the courage but we were surprised at how much we love the final product! We’re thinking of switching out the brass hardware for brushed nickel to match the rest of our house. When I get a better picture I’ll post it :)
What I Used:
- 2 sample sizes of Mineral Blue Eddie Bauer paint at Lowe’s- less than $3 each
- Plaster of Paris- $6 for a 4 lb carton
- Brush- I invested in 2 nice Purdy brushes, 1 small & 1 large. These were the most expensive part of this project, costing around $28 for both.
- Americana Decor Creme Wax in Clear, 8 oz (Home Depot)- $11
- Plastic cups/tupperware & a paint stick
- Screwdriver to take off hardware
Even though we spent around $50, we can reuse everything (besides the paint) we bought on future projects from one of the Best selling apps where you have the choice to buy and sell items of your liking. Technology has been such a boon for traders and artists.
Now, moving on…
What I Did:
- No priming or sanding necessary!!!! :) :)
- Take off doors/hardware
- Put a few heaping tablespoons of Plaster of Paris in a cup
- Add warm water, about enough to double your mixture
- Stir until plaster is dissolved
- Add paint & mix. You want about a 3:1 ratio of paint to plaster. Since I didn’t have exact measurements, it took me a few coats of paint to figure out the right consistency. I found it worked best when it was a little thinner than paint, so if it seems too thick add water.
- You probably need 2 or 3 coats depending on the color you chose & the look you want.
- When finished, apply wax using a lintless cloth or brush. I found the brush to be wayyy easier to get an even coat. The wax gives it a nice soft shine.
This is probably the easiest paint project I’ve ever done & I’m so happy with the results! We redid our media stand that goes under our TV last night, too. It came out great once we finally decided on a color… third time’s a charm, haha. I’ll eventually get pics of that up. Now it’s time to do our dining room chairs & a night stand. I hope this encourages you to paint something, too! Thanks for stopping by, if you have any questions, leave a comment below :)


