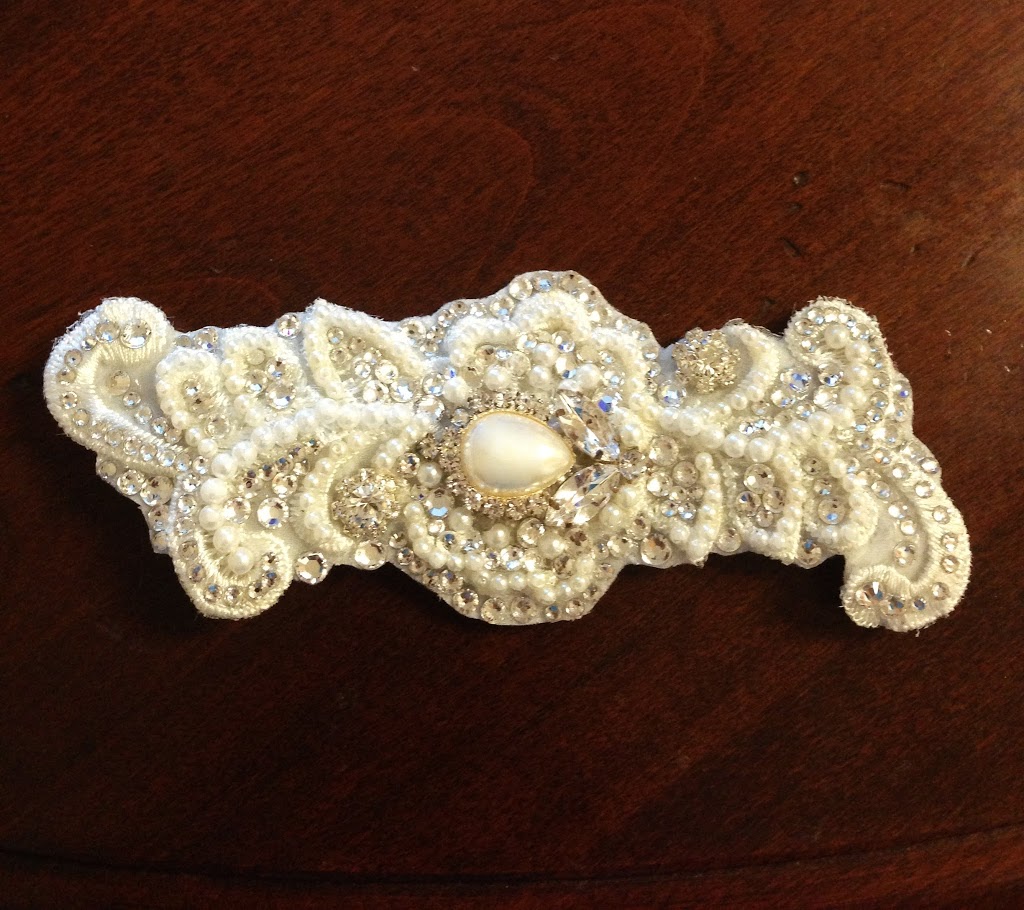
DIY WEDDING HAIR PIECE

Here’s some inspiration for you if you are looking to make your own wedding hair piece. I made mine & was very happy with how it turned out!
What I used:
- A thick felt from Hobby Lobby, I’m not exactly sure what it’s called but I found it in the fabric section. I needed something flexible yet durable to sustain the weight of all the beads.
- Jewel-It, $2.99 for a 2 oz bottle at Hobby Lobby
- Pearl beads I randomly had in my sewing bin
- Tweezers
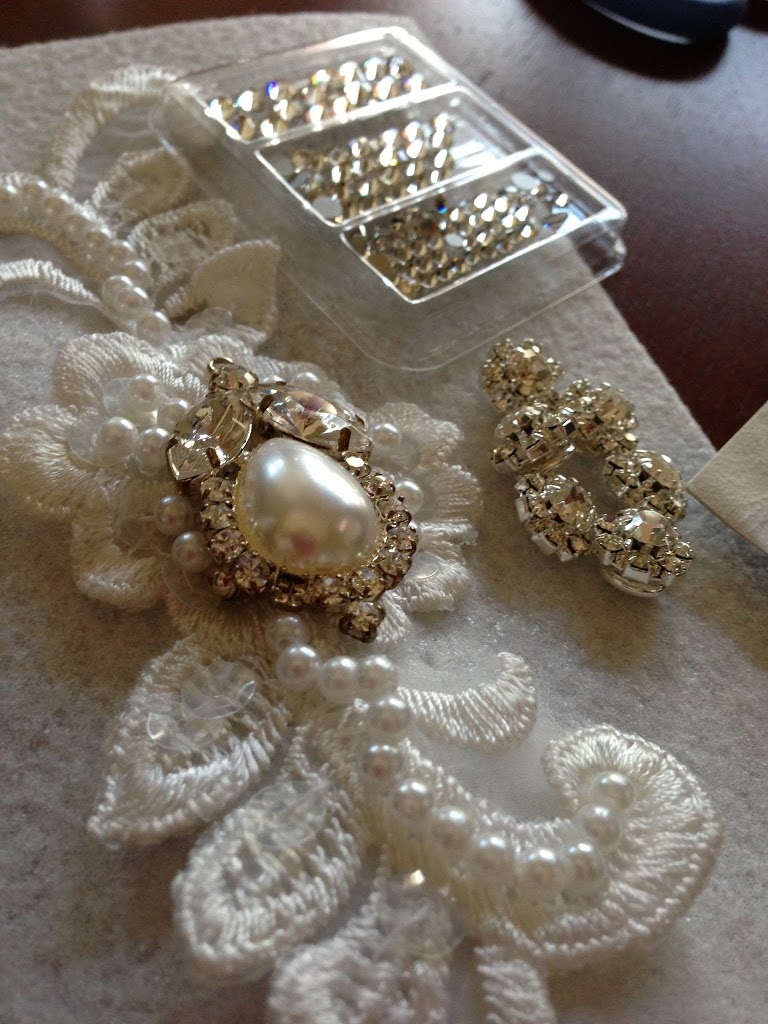
- A brooch I got from my great Aunt
- Hot glue
- Alligator clips for the back
- Scissors
- An applique (is that the right term?) from a flower girl dress my mom picked up at the thrift store for a few dollars. I just cut the design I wanted from the dress.
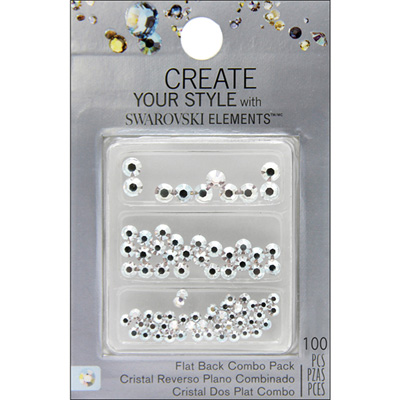
- Create Your Style with Swarovski Elements from Michaels. I think each pack of 100 was $9 & I think I went through 3 of these. I used a 40% or 50% off coupon on each one, though. So it was probably around $15 for these altogether. Here’s what they look like:
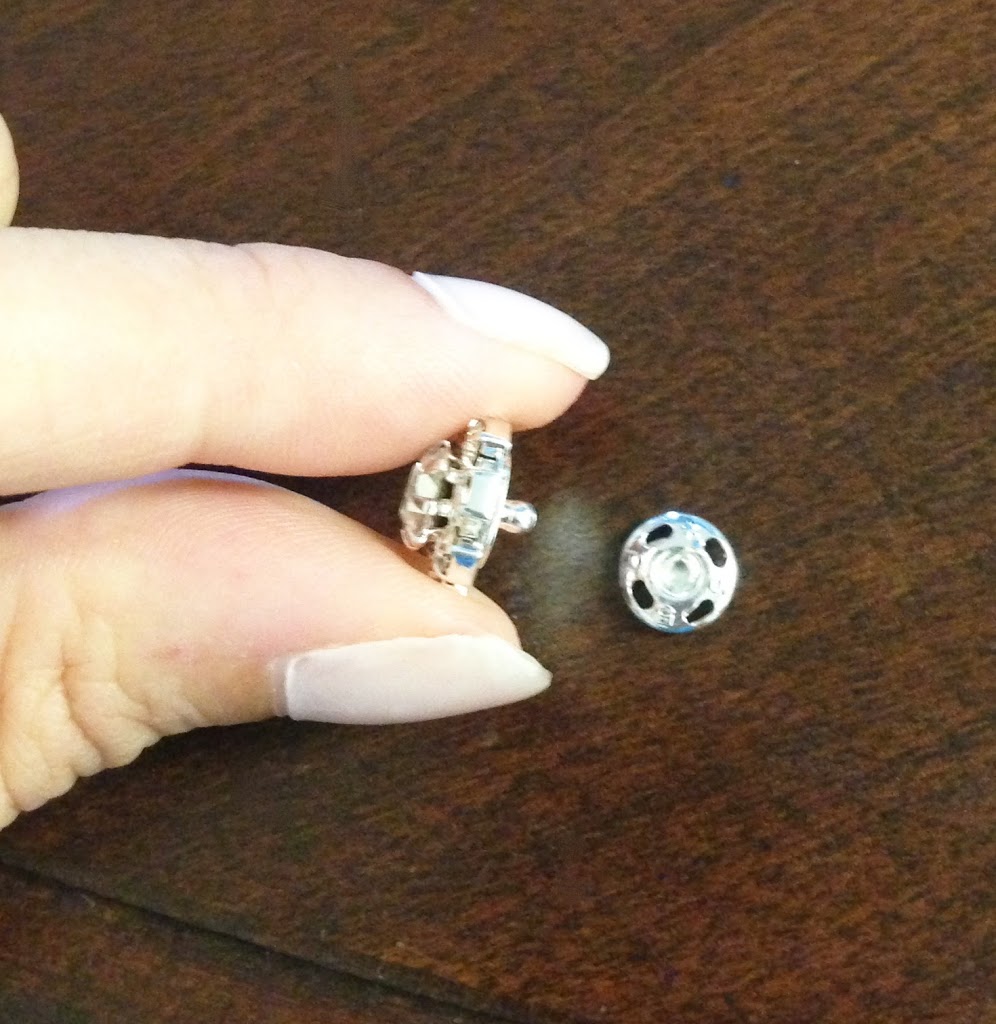
- Rhinestone hair clips I got at Hobby Lobby for $3 in the wedding section. They have a snap on the back like this:
What I did:
- I started by cutting out the design from the thrift store flower girl dress. It already had some pearls on it, & I just left them on there. You can kind of see in the next photo at the bottom right of the design, I left a little extra fabric around the edges in case I wanted to glue on rhinestones. I figured the extra fabric would give the little swirly part support, too.
- I glued the applique onto the felt fabric. I didn’t cut the felt just yet in case I decided I needed more room, but you can trim it down a bit if that’s easier.
- I pinned the brooch right in the middle of the applique. I wanted that to be the center so I could build around it.
- I started to plan where I wanted to place my beads. I figured I could keep the pearl design going & just place the rhinestones around it for embellishment.
- I only ended up using 2 of the hair clips. Since they have the snap on the back they didn’t lay flat, so I took the backs off. I found where I wanted them to go, made little holes in the fabric to push the back through & glued them on that way.
- I used tweezers to hold the beads/rhinestones while I dabbed a little glue on & placed them.
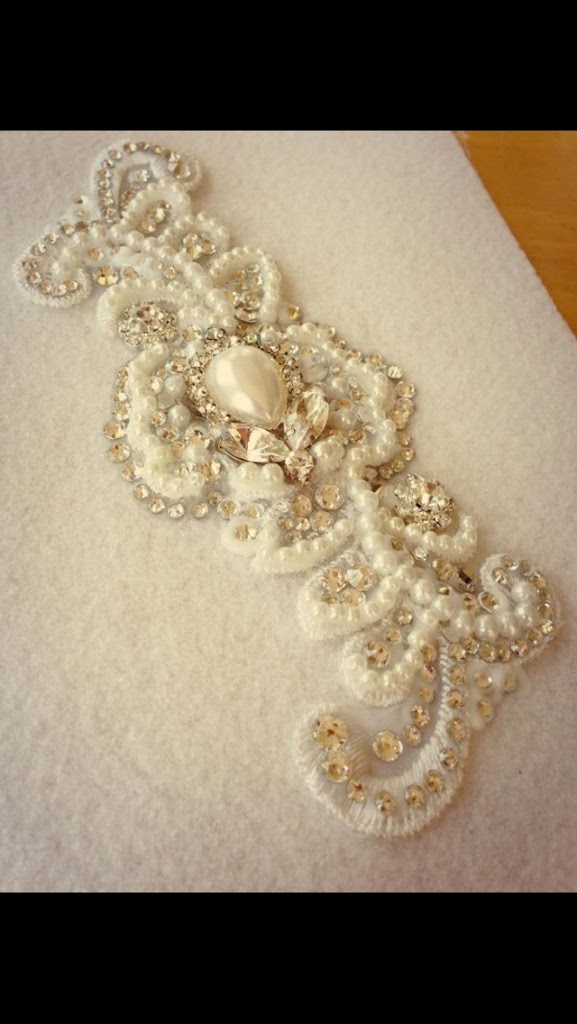
Here’s how it came along:
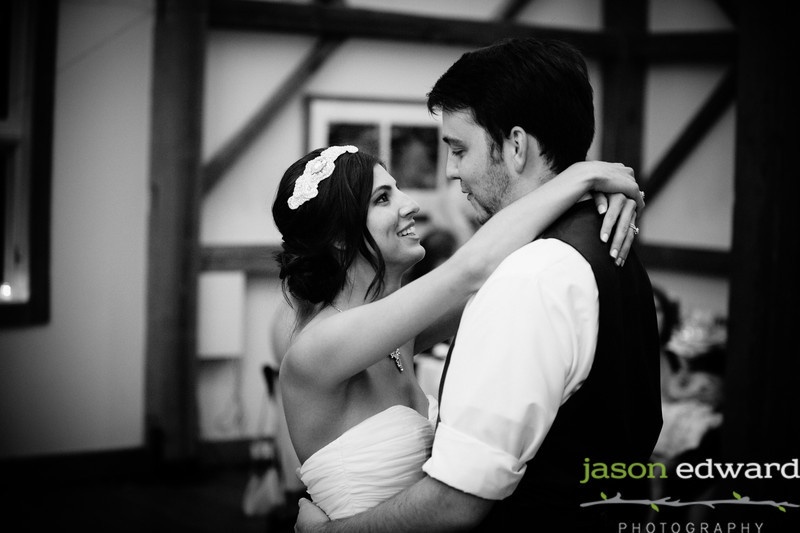
Almost finished! Originally I was going to make this part of a headband, but since I already had my long veil on a different hair piece, I thought it would be too much. (My veil was a DIY project as well. I’ll get that up on the blog eventually!) I met with my friend who was doing my hair for me & we decided a clip would be much easier to add after the ceremony.
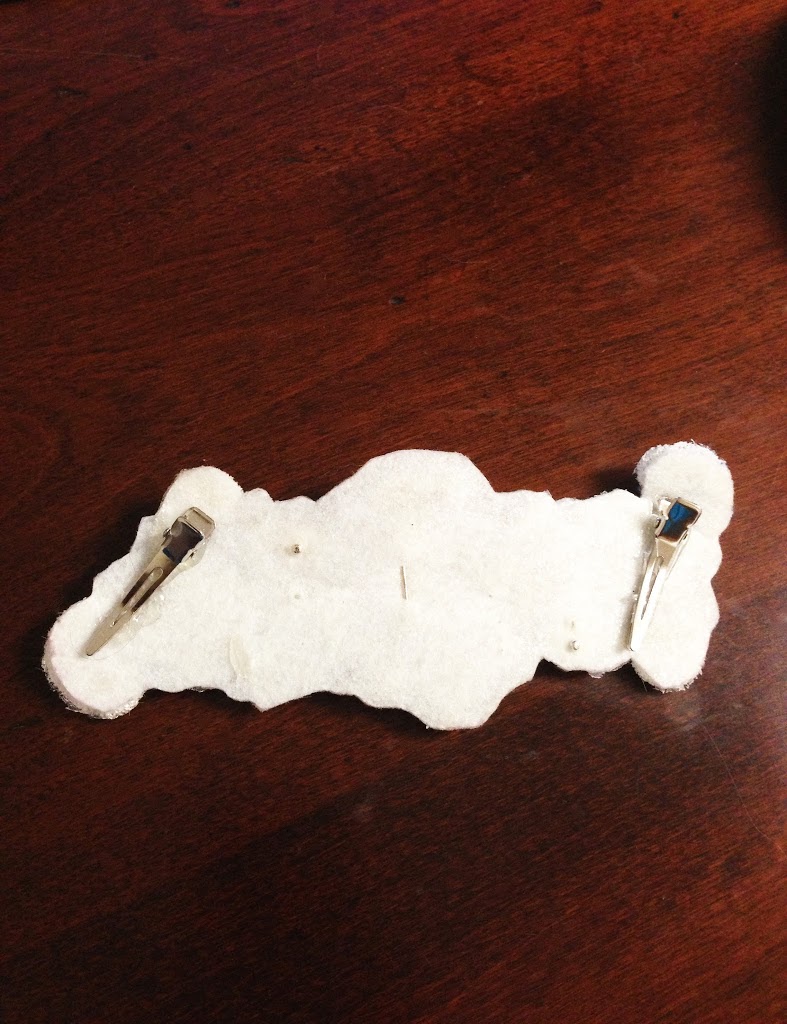
In case you were wondering… the 2 silver dots are the rhinestone hair clips I pushed through the back, & the line in the middle is the pin from the brooch (:
Here’s the finished product:
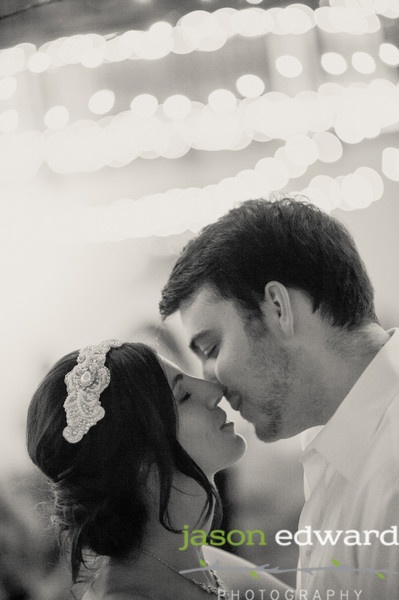
& here it is in action! Thank you, Jason Edward Photography for our AMAZING photos!
I hope you bride-to-be’s out there decide to get crafty & make your own hair pieces as well!

Previous
MY PREGNANCY MEMORY BOOK

Newer